Introduction
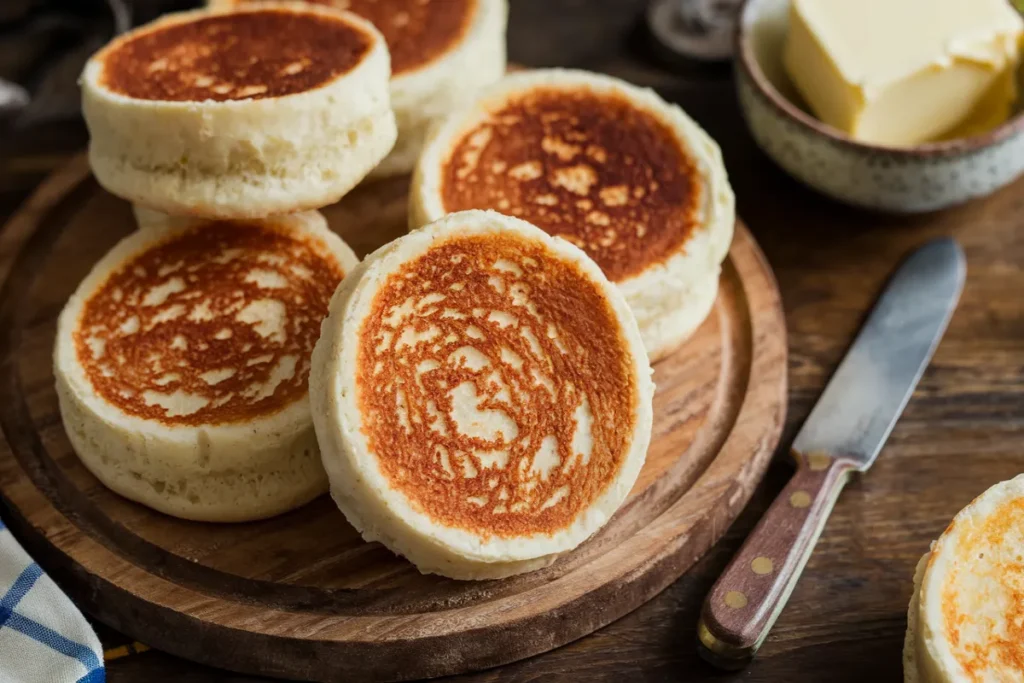
A warm, toasted English muffin is a nice treat. If you are on a gluten-free diet, you might think you have to skip it. But you don’t! With this easy gluten-free English muffin recipe, you can have this tasty breakfast any day. These gluten-free English muffins are made with free flour and tapioca starch. They have a crunchy outside and a soft, fluffy inside.
What makes these gluten free English muffins so special
What makes these gluten-free English muffins so special is not only their delicious taste but also the health benefits they offer. By using gluten-free ingredients, these English muffins are suitable for individuals with gluten sensitivities or celiac disease. They provide a safe and tasty alternative for those looking to enjoy this classic breakfast treat without the gluten. Plus, making them at home allows you to customize the recipe to your liking and dietary needs, ensuring a fresh and flavorful breakfast option every time.
For those looking to try their hand at baking, this gluten free English muffin recipe is a fantastic way to enjoy a homemade version of the popular breakfast staple.
Key Highlights
- This recipe yields delicious gluten-free English muffins that are crispy on the outside and fluffy on the inside.
- The recipe is simple to follow and requires no special equipment—if you don’t have English muffin rings, you can easily improvise.
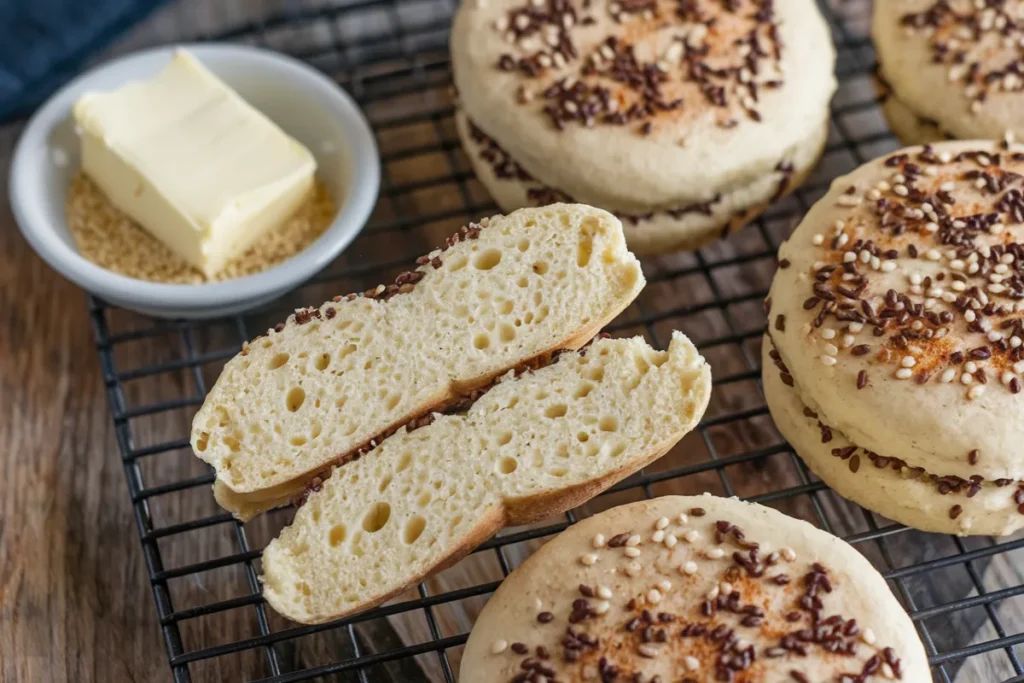
- The recipe includes tips for achieving the classic “nooks and crannies” that English muffins are known for.
- You’ll also find variations for different flavors, as well as vegan and dairy-free options!
- Storage and reheating instructions are included to help you keep your English muffins fresh and delicious.
Delicious Gluten-Free English Muffin Recipe You Need to Try

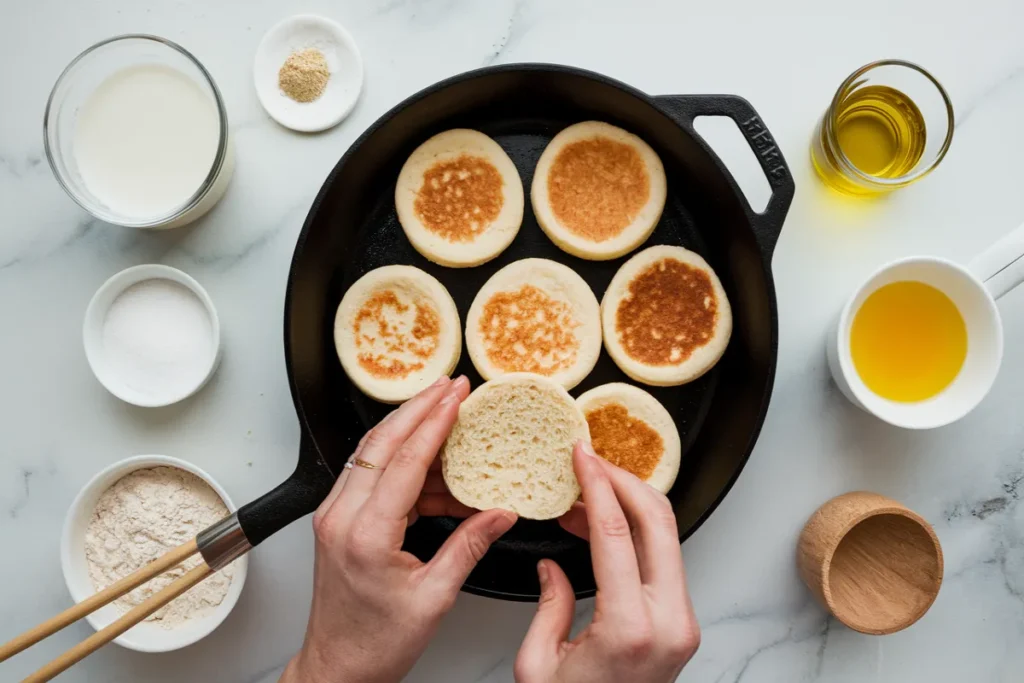
This gluten-free English muffin recipe is simple and can fit your dietary needs. The dough is made with easy ingredients you likely already have at home, and you don’t need to knead it. Once the dough rises, you can cook the English muffins on the stovetop in a cast iron skillet or griddle—no oven is needed!
The best part about these gluten-free English muffins is that they really taste like real muffins. You won’t have to deal with dry and crumbly store-bought gluten-free types anymore! With this recipe, you can enjoy English muffins that are crisp on the outside, soft on the inside, and full of flavor!
Ingredient Spotlight: What You’ll Need for These Muffins
First, you need a good gluten-free flour blend. You can get a ready-made blend like Bob’s Red Mill 1-to-1 Baking Flour or King Arthur Measure for Measure. These are easy to find in most grocery stores. If you want to be creative, you can make your own blend using rice flour, tapioca starch, and potato starch. Besides the gluten-free flour blend, you will also need tapioca starch, even if your blend has it! This helps give the English muffins their special chewiness.
Next, you’ll need psyllium husk. Even though it’s not a typical ingredient for English muffins, psyllium husk helps hold everything together in gluten-free baking. It keeps the muffins in shape and improves their texture.
Finally, you will need active dry yeast. This will make your gluten-free English muffins light and airy! If you’re using instant yeast, use a little less of it.
Step-by-Step Instructions: From Mix to Muffin

- Mix the Dough. Put your dry ingredients in the bowl of a stand mixer. Whisk them together. Next, add the wet ingredients. Mix on low speed until they are just combined. Then, turn the speed to medium and beat the mixture for 2-3 minutes.
- Let the Dough Rise. Move the dough to a greased bowl. Cover it with plastic wrap and let it rise in a warm place for 1-2 hours, or until it doubles in size. You can also place the dough in the refrigerator overnight. This will give it a slightly tangier flavor.
- Shape and Cook the English Muffins. Put the dough on a lightly floured surface. Divide it into 8 equal parts. Shape each part into a ball and flatten it into a disk about 1/2-inch thick. Set the English muffins on a baking sheet lined with parchment paper, cover them loosely with plastic wrap, and let them rest for 30 minutes.
Why These Gluten-Free English Muffins Will Become Your New Favorite
These gluten-free English muffins are not only a delicious breakfast choice but also a healthy and easy option! They are made with good, gluten-free ingredients and are a great source of fiber and protein. Plus, they are simple to make and you can change them to meet your dietary needs!
If you stick to a strict gluten-free diet or just want a healthier option than regular English muffins, this recipe will surely be a new favorite for your family.
The Perfect Balance of Taste and Texture
One of the best things about these gluten-free English muffins is their amazing texture. The mix of tapioca starch and psyllium husk gives them a crispy outside and a soft, fluffy inside. They have all the nooks and crannies of classic English muffins. This makes them perfect for soaking up melted butter, jam, or other toppings!
These gluten-free English muffins also taste great! A little bit of honey or maple syrup adds a nice hint of sweetness.
Since the recipe is so flexible, you can easily adjust the flavor of your English muffins to fit your taste.
Nutritional Benefits of Going Gluten-Free
Are there real health benefits to going gluten-free? If you have gluten sensitivity or celiac disease, it’s important to remove gluten from your diet. Even if you don’t have these issues, you might still see some benefits from cutting out wheat flour. For instance, many gluten-free flours have fewer calories and carbs than wheat flour.
Using flours like brown rice flour, almond flour, or potato starch in your baking can help increase your fiber and nutrient intake. Gluten-free baking often uses a variety of whole grains and alternative flours. This can give you a better mix of nutrients, like vitamins, minerals, and antioxidants.
If you think about reducing gluten, it’s wise to talk to your doctor or a registered dietitian. They can help you find the best plan for your specific dietary needs!
Essential Tools and Equipment for Perfect Gluten-Free English Muffins
Making gluten-free English muffins at home is easier than you think. You don’t need special tools. Still, having the right equipment can make things easier and make your baking better.
In this part, we will talk about the key tools that can help you make perfect gluten-free English muffins every time.
Must-Have Kitchen Gadgets
- A cast iron skillet is the best tool for cooking gluten-free English muffins. This pan heats evenly and keeps heat well. This means you will get beautifully browned and crispy English muffins.
- English muffin rings are optional. They help create evenly shaped English muffins, but they are not necessary. If you don’t have rings, you can use a biscuit cutter, a cookie cutter, or the rim of a drinking glass to shape the muffins.
- You can cook English muffins all on the stovetop. However, many bakers like to bake them briefly in the oven. This helps them cook better and makes them fluffier. If you want to use the oven, you will need a baking sheet and parchment paper too!
Alternatives for Those Hard-to-Find Items
If you don’t have some of the tools listed above, don’t worry! There are many other options you can use! For instance, if you lack a cast iron skillet, you can use a nonstick skillet or a griddle instead. Just make sure to grease the pan well to stop food from sticking.
If you do not have English muffin rings, a biscuit cutter, a cookie cutter, or the rim of a drinking glass can work to shape your English muffins. Flatten the dough into a disk that is about ½-inch thick, then use your chosen tool to cut out circles.
Lastly, parchment paper is great for stopping sticking! If you don’t have it, you can lightly grease your baking sheet with some cooking spray or butter.
Mastering the Art of Gluten-Free English Muffins

Making gluten-free English muffins, like any baking, takes some practice. With a few useful tips and a little patience, you can easily learn to make this tasty breakfast.
Here are some expert tips to help you make perfect gluten-free English muffins every time.
Tips for Getting That Ideal Rise
- Check if your yeast is active. Before mixing your dough, test the yeast. Mix warm water, yeast, and a pinch of sugar in a small bowl. Let it sit for about 5 minutes. If it foams, the yeast is good to use. If there’s no foam, you might need to get new yeast.
- Use warm water, not hot. When you activate your yeast and make dough, use warm water around 100-110°F. Hot water can kill the yeast. Cold water will not activate it well, and your dough will not rise.
- Give enough time for rising. How long your dough needs to rise depends on the type of yeast you use. Instant yeast rises faster than active dry yeast. Also, the kitchen temperature matters. Let the dough rise until it is double its size. This can take anywhere from 1 to 2 hours or longer if you are cold-proofing it in the fridge.
Achieving the Classic Nooks and Crannies
- Use a well-seasoned cast iron skillet or griddle! To get the classic nooks and crannies in English muffins, cook them in a well-seasoned cast iron skillet or griddle. A cast iron skillet heats evenly, giving a nice crust outside while letting the muffins steam and cook in the center. This helps create the perfect texture.
- Don’t overmix the dough! When mixing your dough, be careful not to overmix. Overmixing can make the gluten in the flour develop, which will make your English muffins tough and chewy. Just mix the dough until it comes together, and then stop.
Avoid using a sourdough starter! You can use a sourdough starter to make gluten-free English muffins if it is gluten-free. However, know that this might make the English muffins a bit denser than normal.
Variations to Spice Up Your Gluten-Free English Muffins
One of the great things about this gluten-free English muffin recipe is its flexibility! You can try many different flavors to make your own special English muffins.
Here are some ideas to help you begin.
Flavor Twists: From Sweet to Savory
If you want to make your English muffins a bit sweeter, you can add some dried fruits. Options like cranberries, raisins, or chopped apricots work well. You can also try adding vanilla extract or cinnamon to the dough.
If you prefer a savory flavor, think about adding shredded cheese or chopped herbs such as rosemary, thyme, or chives. You could also include sun-dried tomatoes or roasted garlic. Just remember to use savory ingredients gently so they don’t take over the dough.
No matter what flavors you pick or what your diet is, it’s simple to make tasty, homemade English muffins that everyone will love!
Dietary Adjustments: Vegan, Dairy-Free Options
If you are on a vegan diet, you can easily change this recipe to make dairy-free and egg-free English muffins. Instead of milk, use your favorite plant-based milk. This can be almond milk, soy milk, or oat milk. Make sure it is unsweetened to keep the flavor of the English muffins nice.
For butter, use a vegan butter or some unsweetened applesauce. If you need to replace an egg, try a store-bought egg substitute, or for the best results, use flaxseed meal. Mix 1 tablespoon of ground flaxseed meal with 3 tablespoons of water. Let it sit for 5 minutes to get thick. This gel will help hold the English muffins together, just like an egg!
With these easy swaps, you can enjoy tasty vegan English muffins that are just as good as the original recipe.
Serving Suggestions: Beyond the Breakfast Table
Gluten-free English muffins are usually eaten for breakfast, but you can enjoy them in many ways at any time.
You can make classic breakfast sandwiches or try new and creative dishes for lunch and dinner. Get ready to see how many tasty meals you can create beyond just breakfast!
Creative Ways to Enjoy Your Gluten-Free English Muffins
- Toast: The easiest way to enjoy a gluten-free English muffin is to toast it until it’s golden brown. Then, spread your favorite toppings on it, like butter, cream cheese, nut butter, or jam! Toasting the muffin will make its texture better and more satisfying.
- Eggs Benedict: For a fancy brunch, use your gluten-free English muffins to make Eggs Benedict. Top the toasted muffin halves with Canadian bacon or smoked salmon. Add perfectly poached eggs and some creamy Hollandaise sauce for the best taste.
- Sandwiches: Besides breakfast, you can use these gluten-free English muffins to make many tasty sandwiches. From classic grilled cheese to filling breakfast sandwiches, the options for delicious sandwiches are endless!
Pairing Ideas for Every Meal
- Breakfast Pairings: To have a balanced breakfast, pair your gluten-free English muffins with protein options like eggs, bacon, sausage, or smoked salmon. You can also serve them with fresh fruit or a simple salad for extra nutrients.
- Lunch Pairings: For a light and filling lunch, serve your gluten-free English muffins with a warm soup or a fresh salad. Think about pairing them with tomato soup and grilled cheese or a green salad with a chicken or tuna salad sandwich on an English muffin.
- Dinner Pairings: For a warm dinner, use gluten-free English muffins to make mini pizzas. Just add your favorite toppings!
Preserving Your Gluten-Free English Muffins: Storage Tips
Proper storage is important to keep your homemade gluten-free English muffins fresh and tasty! Whether you want to eat them right away or save them for later, you should follow these easy storage tips to keep their flavor and feel just right!
Best Practices for Refrigerating and Freezing
Refrigerating: First, let your gluten-free English muffins cool down completely. After they are cool, put them in an airtight container or a resealable freezer bag. This will keep moisture and air out. When stored this way in the refrigerator, your English muffins will stay fresh for up to 3 days.
Freezing: If you are making more muffins or want to eat them later, freezing them is a good choice. Start by wrapping each English muffin tightly in plastic wrap or aluminum foil. After wrapping, put the muffins in a freezer bag. Squeeze out as much air as you can before sealing it tight. If frozen properly, your English muffins can last in the freezer for up to 2 months.
Don’t forget to label your freezer bags with the date to see when they were made. When you want to eat them, just thaw them overnight in the fridge or reheat them straight from the freezer using your favorite method.
How to Reheat for That Fresh-Baked Taste
- Toaster: The fastest and easiest way to reheat your gluten-free English muffins is by using a toaster! Just put in one muffin half or two and toast them to how crispy you want. Remember that gluten-free bread can toast faster than regular bread, so watch them carefully!
- Oven: To heat several English muffins while keeping them soft, set your oven to 350°F (175°C). Wrap the muffins in aluminum foil to keep them from drying out. Warm for about 10-15 minutes. If you prefer a bolder texture, place them on a baking sheet and heat for about 5-7 minutes. Unwrap the muffins during the last few minutes of baking for extra crispiness.
- Keep in mind that reheating times can vary based on your oven and how many muffins you have. Always check if they are warm enough and change the heating time if needed. Enjoy your hot, gluten-free English muffins fresh and ready to eat!
FAQ about Gluten Free English Muffin Recipe
Can I use almond flour in place of gluten-free flour blend?
Almond flour is a well-liked gluten-free choice. However, using it instead of a gluten-free flour blend can make the texture heavier. This swap can change how your baking turns out. The English muffins may not rise well or have the texture you want.
Are these English muffins low FODMAP friendly?
Following a low FODMAP diet means you might need to avoid some foods. If that’s important for you, these free English muffins might not be the best choice because of certain ingredients. Always check the ingredient list of any recipe to make sure it fits your dietary needs!
Conclusion For Gluten Free English Muffin Recipe
Enjoy the wonderful experience of making and tasting these gluten-free English muffins. They are full of flavor and good for you. This recipe will step up your breakfast game. It works for many different diets. With a great mix of taste and feel, these muffins could be your new favorite. Try out fun ways to serve them all day long. Learn how to bake these tasty treats with useful tips. Don’t miss out on the joy of making food at home. Start your day right with these gluten-free English muffins!

